About this deal
To close the scrunchie wiggle the unfolded end of the scrunchie tube into the folded end and pin. Sew across the fabric and through the elastic to close the tube. You’ll still have a small opening in the tube, right next to the short seam you’ve just completed. Reach into this opening and turn the tube of fabric right side out. It should come through pretty easily. Fold the fabric in half and pin to hold in place. Sew along the pinned edge 3″ (8cm)with a 1/4 inch seam allowance then stop sewing and leave a small opening about 2″ (5cm) wide. Place elastic around your wrist or cut as measurements above. Thread the elastic through the opening in the seam and tie off with a knot. Take the scrunchie to your sewing machine and sew across the ends of the elastic several times with a zigzag stitch. Make sure not to catch the fabric in this stitching, keep it pulled forward and out of the way.
You can make this scrunchie without a sewing machine by substituting hand sewing with a needle and thread in each step that calls for machine sewing. Sew a ladder stitch to close the 1-inch opening or draw a small line of Beacon fabric-tac along the seam allowance of the opening to close it. Gently pinch the fabric together and let the glue dry.
More Accessories To Sew
Here are the instructions for cutting out your fabric and elastic. Plus, I’ve given you some advice on customizing the size of your scrunchie to fit your style. Fabric
Next, we have a sophisticated scarf bow that gives your scrunchie the look of handkerchief or scarf “tails”. It’s very easy to make, too.
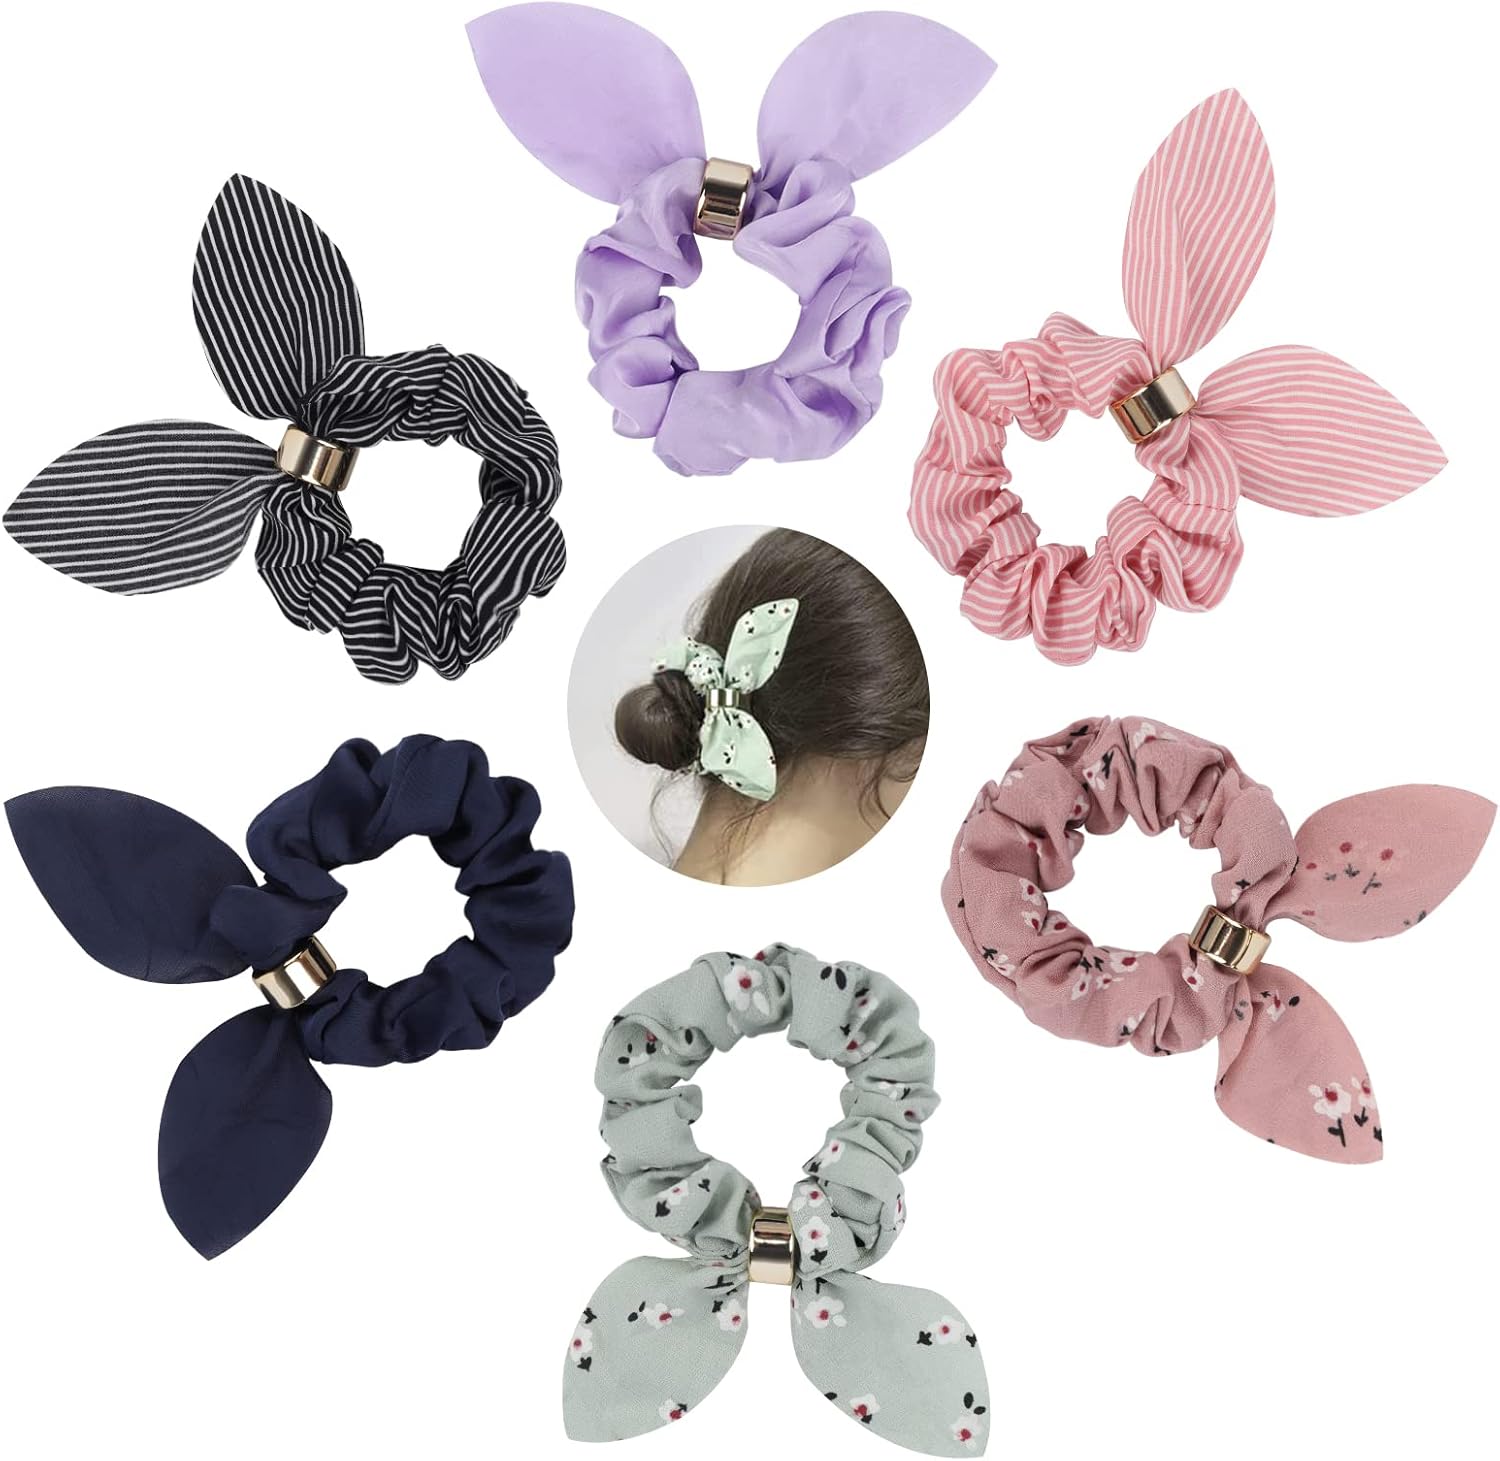
How to make bunny ear bows for a scrunchie (step-by-step):
Below, I've listed out all of the different options offered in this pattern along with photos so you can choose your favorite style. Basic Scrunchies Learn how to make your very own DIY hair scrunchie with this easy step-by-step tutorial. I’ll show you how to sew a seamless, professional-looking scrunchie with a sewing machine or by hand. Plus, I’ll give you three easy options to add bows or tails to your custom scrunchies. DIY Hair Scrunchies TIP: I find it’s easier to turn a tube right side out if I stitch across one of the short ends and then use a wooden towel pushed into that closed end to turn it right side out. Then, once it’s turned right side out, I just clip off that stitched end. It makes my fabric tube about ¼” shorter but scrunchies don’t require precise measurements so that’s okay. Place the two pieces with the right sides together and sew around, leaving 2" unsewn somewhere in the middle of the piece: Step 10 - Trim and Turn NOTE: when making the scarf scrunchie, cut the two scarf pieces MIRRORED. Step 9 - Sew Pieces Together
 Great Deal